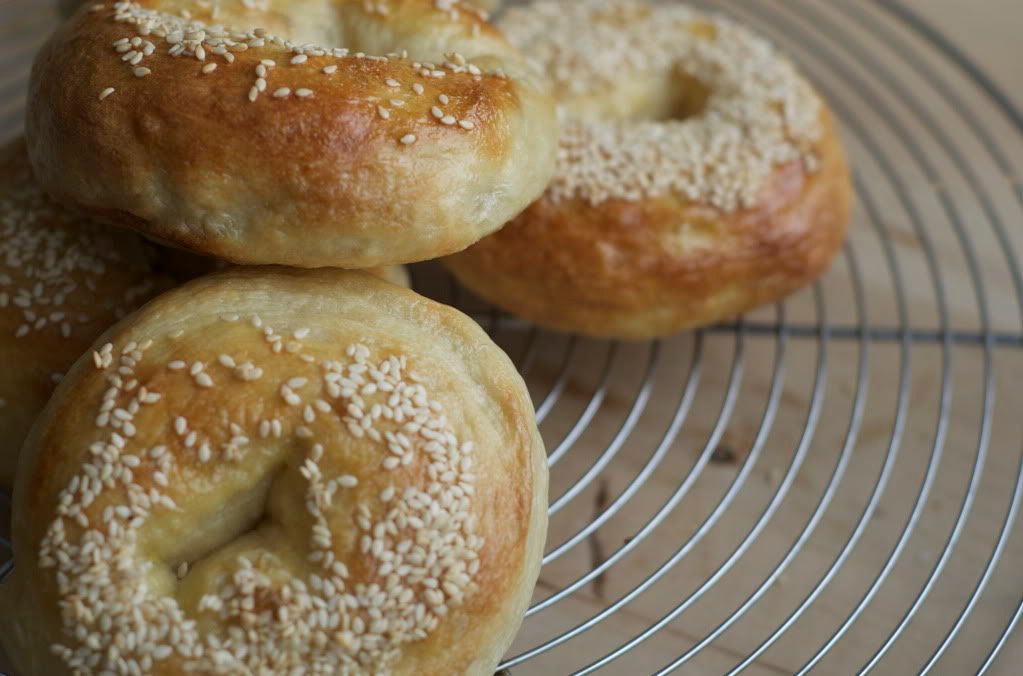
It really should be said that bagels are not the most photogenic of baked goods – at any stage. They go from looking like pancake batter to a bowl of psoriasis, from dry looking monster slugs to shiny boiled bread. It is only in their last moments that they lay in beautiful full baked and browned glory, transforming from yeasty pimpled teenager to sleek bronzed beach babe.
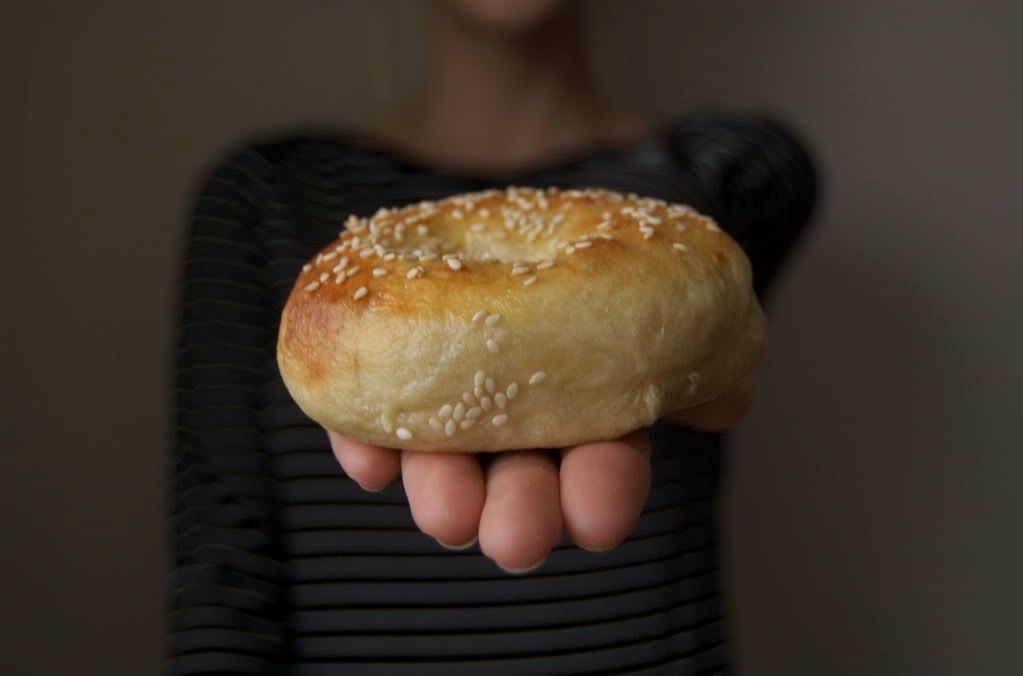
Hence, there is a distinct lack of bagel photos here. But fear not what is lacking in pictures is made up for in the extensive directions below! I would seriously recommend trying your hand at these – they were simple, easy, and though a little bit of a time suck they really are worth it. I would couch my encouragement in one simple suggestion: pace thyself.
I made the mistake of starting these late on Monday night, my baking day, and what I was thinking I will never know. Jared came home to me meticulously weighing dough on the only scale I could find (a vintage postage scale) and attempting to look up “the windowpane test” (bah humbug – never found it in time, and mine worked fine) on a flour covered Mac. I was up this morning at 5:30am trying to finish 1/2 a batch to photograph and have ready for Wednesday’s post. That smile you see in the following photos? Pure, caffeine induced delirium.
These bagels however were well worth it – crisp, delicious crusts, just enough of the homemade yeasty scent, crisp sesame seeds and a whole lot of delirious love. I’m going to freeze 1/2 and watch J, (who begrudgingly got out of bed as I leapt up and down on it this morning yelling “Look at my bagels, bitch!”) eat the rest.
{This Recipe is adapted from the Peter Reinhart Bagel Recipe. Any changes are noted.}


Sponge
1 teaspoon instant yeast
4 cups unbleached bread flour (or high gluten flour)
2 1/2 cups water, room temperature
Dough
1/2 teaspoon instant yeast
3 1/4 cups bread flour* (or high gluten flour)(originally called for 3 3/4, but I bailed after the first 1/4, my dough was perfect)
2 3/4 teaspoons salt
(This recipe also calls for 1 tbsp of malt syrup or 2 tbsp of malt powder. Given that I already have an allergy to wheat, adding any further guarantee of watching the Bachelor from the comfort of our washroom seemed unnecessary. From what I can tell, there isn’t much missing here as the bagels tasted phenomenal. Phenomenally dangerous.)
To Be Fancy: Sesame Seeds, Poppy seeds


To make the sponge, stir the yeast into the flour into a large mixing bowl. Add the water, whisking or stirring only until it forms a smooth, sticky batter (like pancake batter). Cover the bowl with plastic wrap and leave at room temperature for approximately 2 hours, or until the mixture becomes very foamy and bubbly. It should swell to nearly double in size and collapse when the bowl is tapped on the countertop. (Mine never collapsed, and I put it near a warm oven and it took about an hour and a half to reach the desired consistency.)

Once the sponge is ready, add the additional yeast and stir. Then add 3 cups of the flour and all of the salt (and malt if you choose to use it). I sifted the flour and salt together because I’m a bit retentive about distribution. Thanks Mom!
At this point the recipe instructs you to stir with a dough hook, however being too poor for a Kitchen Aid and unaware of any pirates for hire, I used my hands. Stir with hands until the ingredients for a ball, slowly working in the remaining 3/4 cup flour to stiffen the dough. (As mentioned, I only used 1/4 cup of that.)
Knead the dough until firm, approximately 10 minutes. The recipe says that it “should be firm, stiffer than French bread dough” however, I have no idea what that means, so I went with the other directions, that it should be “pliable and smooth” and “satiny but not tacky”. I tested this by running it across my face and thinking about sleeping on a slip. Science!
There should be no dry flour – all ingredients should be mixed in and nothing should be flaky or chunky. The dough should pass the windowpane test and register 77 to 71 degrees F. (See the link. I had no idea what this meant at the time, I just kept kneading the dough until it felt like a nice pillow…) If the dough seems to0 dry and rippy, add a few drops of water and continue kneading, add flour if it’s too tacky.
Divide the dough into balls – I weighed mine to 65 grams each, and they were the perfect size later. Put these on a cookie sheet and cover them with a warm damp tea towel and let them rest for about 20 minutes. When this is done, take each ball and roll it into a sluggy worm shape, about the 2/3 the thickness of (shocking) a bagel. Put one end of the slug in your palm, stretch it around the back of your hand and place it on top of the other end piece. Roll your hand back and forth on the counter to seal the bagel together. Put these on a pan lined with parchment paper and lightly oiled, cover with plastic wrap, let sit for 20 minutes.
Let the pans sit at room temperature for about 20 minutes.
In order to see if the bagels are ready to be “retarded” (I know, awesome.) do the “float test”. In a bowl of room temp water, drop one of the bagels and wait for it to float. If it floats within 10 seconds, you’re good to put them in the fridge (just pat off the wet bagel and put it in too), and if it doesn’t wait another 10 minutes, and try again. Once they float – put the trays in the fridge immediately.


Preheat the oven to 500 degrees F with the two racks set in the middle of the oven. Bring a large pot of water to a boil. Drop your bagels gently one by one into the boiling water, and boil for one minute on each side. (I boiled my bagels in batches of five in a really large pot, and this was a really manageable batch to deal with). The longer you boil your bagels, the chewier they are going to be. I got mesmerized by an A-Team trailer, so one batch boiled for at least three minutes. Whoops! Still delicious.
When the bagels are boiled, put them back on the parchment on the baking pan. Put the bagels in the oven for five minutes, then rotate the pan 180 degrees and continue baking for another five minutes. (I took them out at five minutes, lightly brushed the tops with an egg wash and sprinkled sesame seeds on top before replacing for the remaining time.) I didn’t actually bake these for five minutes – more like 13-15 minutes total, and judged entirely by the color of the bagels.
Take them out.. let them cool.. enjoy!